Frozen Animal Rescue
Lesson Plan:
Activity:
Frozen Animal Rescue
Lesson plan developed by Ms. Erika Geelhoed, BA Ed
Age Group:
* Lesson plan objective and assessment can be adapted to use this activity with school-age children.
Objectives:
Children will:
- be introduced to non-fiction text.
- develop fine and gross motor skills.
- engage in cooperative play with other children.
II.5.2b
- Materials promote early literacy
- b) Developmentally appropriate books are available
Materials:
- ice molds
- water
- squeeze bottles
- food coloring
- small animal figurine
- salt
- spoons
- small hammer
Procedure:
- Prep for the activity by filling the molds with water and animal figurines.
- Freeze until solid.
- Add warm water to the squeeze bottles along with a few drops of food coloring.
- Place the frozen blocks, water bottles, salt, spoons, and hammer into a large plastic bin.
- Invite the children to remove the animals from the ice using the tools provided.
Assessment:
- Observe and record the chldren’s fine motor skills. What techniques did they come up with for removing the animals?
Click on the course icon for enrollment information.
Magnet Magic
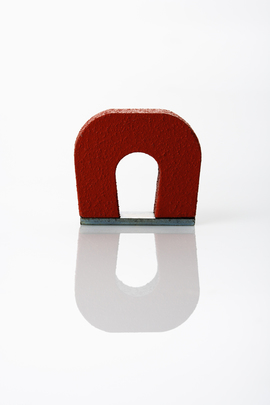
Magnets Throughout the Classroom
When introducing preschool students to magnets, explain that magnetic objects will attach on their own to some, but not all, types of surfaces. Children can discover for themselves the surfaces that attract magnets:
Dancing String
Attach something metal to a string. Hang the string from a table or the ceiling. Let your children use a magnet to make the objects dance.
What Does a Magnet Stick To
Have the children decorate tongue depressors or Popsicle sticks. Put a piece of magnet tape on the stick. Next take your children on a walk around the school to see what the magnet sticks will stick to.
Magnetic Pans
Fill cupcake pans with sand. Put different metal objects in the sand. Cover the top with something so that the children cannot get to the sand. Finally, give your children magnetic wands to move the metal objects around with.
Magnet Cars
When introducing preschool students to magnets, explain that magnetic objects will attach on their own to some, but not all, types of surfaces. Children can discover for themselves the surfaces that attract magnets:
- Encourage children to test different surfaces throughout the room to see where their magnets will stick. Examples of surfaces that can be used in this experiment include wooden table tops, steel doors or walls, carpet, and metal chair legs.
- Each time a new surface is tested, ask the children the question "Does the magnet stick to the ____?". After the experiment is finished, briefly explain how and why magnets are attracted to types of metal.
Dancing String
Attach something metal to a string. Hang the string from a table or the ceiling. Let your children use a magnet to make the objects dance.
What Does a Magnet Stick To
Have the children decorate tongue depressors or Popsicle sticks. Put a piece of magnet tape on the stick. Next take your children on a walk around the school to see what the magnet sticks will stick to.
Magnetic Pans
Fill cupcake pans with sand. Put different metal objects in the sand. Cover the top with something so that the children cannot get to the sand. Finally, give your children magnetic wands to move the metal objects around with.
Magnet Cars
- Attach bar magnets to the fronts of small toy cars with masking tape.
- Make sure that the magnets are attached, so that some will repel and some will attract.
- Let the children play with the cars.
- Ask them to roll two cars toward each other. What happens?
- Can they figure out a way to push a car without touching it?
